

Is your garage door causing you frustration by refusing to open or close when you need it the most? Imagine coming home after a long day, only to find yourself stuck outside due to a malfunctioning garage door. Don’t worry; we’ve got you covered. In this blog, we will delve into the 15 most common reasons why your garage door may be acting up and explore effective solutions to get it back on track.
From faulty garage door openers to issues with torsion springs and door tracks, we will address the key culprits behind your door’s misbehavior. Expert advice on troubleshooting, maintenance tips, and step-by-step instructions for fixing a non-responsive garage door will be at your fingertips. Stay tuned to discover how to ensure your garage door operates smoothly, providing you with the convenience and security you deserve.
Are you ready to bid farewell to the inconvenience of a malfunctioning garage door? Let’s explore the potential solutions together in this comprehensive guide.
Introduction to Troubleshooting a Garage Door
Having trouble with your garage door not opening? It can be an inconvenience and a source of frustration. Understanding the common reasons behind a malfunctioning garage door and knowing how to troubleshoot the issue can save you time and money. In this section, we will provide an overview of the troubleshooting process to help you get your garage door functioning smoothly again.
A garage door failing to open can be caused by various factors, ranging from simple issues to more complex problems. By familiarizing yourself with the common causes, you can identify and resolve the issue efficiently. Troubleshooting your garage door will not only help in immediate fixes but also prevent future problems by maintaining its optimal performance.
It is important to approach troubleshooting with caution and follow safety guidelines as garage doors can be heavy and operate under tension. If you are unsure or uncomfortable with any step, it is recommended to seek professional assistance.
Stay tuned as we delve into the common reasons behind a garage door not opening and provide step-by-step instructions on how to address each issue effectively. Let’s get started on troubleshooting your garage door!
Difficulty and Duration of Fixing a Garage Door
Fixing a garage door can vary in difficulty and duration, depending on the specific issue at hand. Some problems may be simple to diagnose and resolve, while others may require more extensive repairs. For minor issues such as a faulty remote control or a tripped circuit breaker, the fix can be relatively quick and straightforward. However, complex problems like a malfunctioning garage door opener motor or damaged torsion springs may take more time and expertise to address. It is important to note that attempting to fix certain issues without proper knowledge and tools can be dangerous. In such cases, it is advisable to seek professional assistance from a trained garage door technician. By understanding the complexity of the problem, you can better gauge the time and effort needed to restore your garage door’s functionality.
Common Reasons for a Garage Door Not Opening
When your garage door refuses to open, it can be frustrating and inconvenient. To help you troubleshoot and address this issue, we have compiled a list of the 15 most common reasons why a garage door won’t open. By identifying the cause of the problem, you can take the necessary steps to fix it and restore the smooth operation of your garage door.
1. Remote Control Malfunction
-Check if the remote control batteries are dead or if there is a problem with the signal transmission.
2. The Circuit Breaker is Tripped
-Inspect the circuit breaker that controls the garage door opener motor.
3. Garage Door Opener Failure
-If your garage door opener motor is not functioning, it might need repairs or a replacement.
4. Safety Sensor Issues
-Verify that the safety sensors are aligned properly and not obstructed by any objects.
5. Torsion Spring Problems
-Broken or worn-out torsion springs can prevent the garage door from opening.
6. Damaged Cables
-Examine the cables for fraying or damage and replace them if necessary.
7. Misaligned Door Tracks
-Make sure the garage door tracks are aligned and not bent or damaged.
8. Malfunctioning Door Opener Mechanism
-Check for any faults or malfunctions in the garage door opener mechanism.
9. Faulty Wall Switch or Keypad
-Inspect the wall-mounted control keypad and wall switch for any issues.
10. Interference with Photo Eye
-Ensure the photo eye sensors are clean and correctly placed, as they can prevent the door from opening if obstructed.
11. Lock Mode Engaged
-Check if the garage door is in lock mode, preventing it from opening.
12. Sensor Blocking the Door Close Path
-Remove any objects that might be blocking the path of the door close sensor.
13. Opener Motor Overheating
-Allow the opener motor to cool down, as overheating can prevent the garage door from opening.
14. Remote Control Frequency Interference
-If multiple openers function on the same frequency, interference might occur.
15. Insufficient Power Suppl
-Ensure the garage door opener is receiving sufficient power from the circuit board.
By addressing these common reasons, you can troubleshoot and resolve the issue of a garage door not opening. However, if you encounter challenges or need further assistance, it is recommended to seek the help of a professional garage door technician for expert advice and service.
Check the External Controls
To troubleshoot a garage door that refuses to open, it’s essential to inspect and verify the functionality of the external controls such as remotes and wall-mounted keypads. These controls play a crucial role in commanding the garage door’s movements, so addressing any issues with them can often resolve the problem.
Here are the steps to check the external controls:
1. Inspect the remote control
-Start by checking the remote control’s battery. Replace it if necessary, as a weak battery can prevent the signal from reaching the garage door opener. Ensure that the remote is within the recommended distance range and that there are no obstructions interfering with its signal.
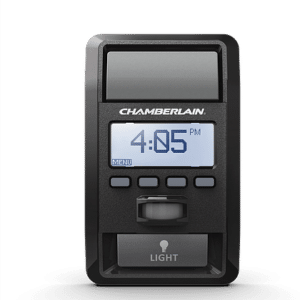
2. Assess the wall-mounted keypad
-If your garage door has a wall-mounted keypad, make sure it is securely mounted and free of any physical damage. Enter the correct access code and listen for any audible response from the opener. If the keypad doesn’t produce any sound or the response is inconsistent, the keypad may need to be reprogrammed or replaced.
3. Verify the remote signal
-Stand within range of the opener and manually trigger the remote control. Listen for any clicking noise from the opener, indicating that it has received the signal. If there is no response, it suggests a potential issue with the remote or the opener’s receiver.
By following these steps to check the external controls, you can identify any issues that may be preventing your garage door from opening. If the problem persists, it may be necessary to investigate other possible causes, such as the safety sensors, limit switches, or the garage door opener mechanism.
Check the Garage Door Safety Sensors
One of the common reasons why a garage door may refuse to open is a malfunctioning safety sensor. Garage door safety sensors are an important feature that prevents the door from closing if an object or person is detected in its path. If these sensors are misaligned or not functioning correctly, it can result in the door not opening.
To troubleshoot the garage door safety sensors, follow these steps:
1. Visual Inspection
-Start by visually inspecting the safety sensor units located on each side of the garage door. Ensure that there are no obstructions blocking the sensors and that they are clean and free from any dirt or debris.
2. Sensor Alignment
-Check if the sensors are properly aligned. They should be facing each other so that the infrared beam sent between them is uninterrupted. Use a level to ensure they are at the same height and adjust their positions if needed.
3. Sensor Indicator Lights
-Most safety sensors have indicator lights that will change color or blink to indicate their status. Check the sensor lights and consult the user manual to understand what each light pattern means.
4. Clean the Sensors
-Use a soft cloth to clean the sensors and remove any dirt or grime that may be causing interference.
5. Wire Connections
-Inspect the wire connections between the safety sensors and the garage door opener. Ensure that they are securely connected and not damaged.
By following these steps, you can troubleshoot and address any issues with the garage door safety sensors. This ensures that they are properly aligned and functioning, allowing the garage door to open and close securely. If you continue to experience problems, it is recommended to consult a professional garage door technician for further assistance. Remember, safety should always be a top priority when dealing with garage door repairs.
Adjust Garage Door Limit Switches
The limit switches of your garage door play a crucial role in determining the open and close positions. If these switches are not properly adjusted, your garage door may refuse to open or close entirely. Fortunately, adjusting the limit switches is a relatively simple process that can rectify this issue.
1. Locate the Limit Switches
-The limit switches are usually located on the garage door opener unit or near the motor. Refer to your garage door opener’s manual to find the exact location.
2. Identify the Open and Close Limit Switches
-The opener unit typically has two limit switches: the open limit switch and the close limit switch. These switches control the distance the garage door can travel in the open and close positions.
3. Adjust the Open Limit Switch
-To increase the open position, turn the open limit switch clockwise. To decrease the open position, turn it counterclockwise. Make small adjustments until the door opens to the desired height.
4. Adjust the Close Limit Switch
-To increase the close position, turn the close limit switch clockwise. To decrease the close position, turn it counterclockwise. Again, make small adjustments until the door closes fully.
5. Test the Garage Door
-After making the adjustments, test the garage door to ensure it opens and closes smoothly to the desired positions. If necessary, continue fine-tuning the limit switches until the door operates correctly.
Remember, if you’re unsure about adjusting the limit switches or experience any difficulties, it’s always recommended to consult a professional garage door technician for assistance.
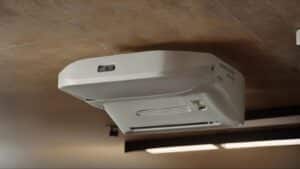
Check Garage Door Opener Mechanism
The garage door opener mechanism is an integral part of the system responsible for the smooth operation of your garage door. If your garage door is not opening, it’s essential to inspect the opener mechanism for any faults or malfunctions that may be causing the issue. Here are some steps to guide you through the process:
1. Start by checking the power source
-Ensure that the opener is securely plugged in and receiving power. If it’s connected to a power outlet, try plugging in another device to ensure the outlet is functioning correctly.
2. Verify the remote signal
-Test the remote control by pressing the buttons and observing if the opener receives the signal. If it doesn’t, replace the batteries and reprogram the remote control to the opener.
3. Examine the wall switch
-Check the wall switch for any visible signs of damage or loose connections. If necessary, replace it to eliminate the possibility of a faulty switch.
4. Inspect the circuit board
-Open the garage door opener housing and examine the circuit board for any burnt or damaged components. If you notice any issues, it may be necessary to replace the circuit board.
5. Check the safety sensors
-Ensure that the safety sensors are properly aligned and free from any obstructions. Clean the sensors and adjust them if needed to ensure they are facing each other and aligned correctly.
By performing these checks on the garage door opener mechanism, you can identify and resolve any faults or malfunctions that may be preventing your garage door from opening. If the issue persists or you are uncertain about the cause, it’s recommended to seek the assistance of a professional garage door technician.
Remember, safety should always be a priority when working with garage door mechanisms. If you are unsure or uncomfortable with any steps, it is best to consult a qualified technician for assistance.
Check Garage Door Springs and Cables
Inspecting the torsion springs and cables of your garage door is crucial in troubleshooting and resolving issues related to its operation. These components play a vital role in supporting the weight of the door and ensuring smooth movement. Here are the steps to follow:
1. Safety first
-Before you begin inspecting the springs and cables, ensure that you disconnect the power to your garage door opener to prevent any accidents or injuries.
2. Visual inspection
-Carefully examine the springs and cables for any signs of wear, damage, or fraying. Look out for rust, gaps, or loose connections. If you notice any issues, such as broken or stretched springs, or frayed cables, they will likely need replacement.
3. Leave it to the professionals
-It is important to note that garage door spring replacement can be dangerous and should be handled by experienced technicians. These springs are under high tension and mishandling them can lead to serious injuries. It is best to contact a reputable garage door service provider to ensure proper replacement and minimize the risk.
Remember, a malfunctioning garage door can be a safety hazard and may cause inconvenience. By regularly inspecting your garage door springs and cables, you can identify and address any issues promptly, ensuring the smooth and safe operation of your garage door.
Check Garage Door Tracks and Rails
Properly functioning tracks and rails are essential for smooth garage door operation. Over time, dirt, debris, and even rust can accumulate, causing friction and impeding the door’s movement. Regular inspection and cleaning of the tracks and rails can help prevent unnecessary wear and tear, ensuring the longevity of your garage door system. Here’s how you can perform this maintenance task:
1. Visual Inspection
-Start by examining the tracks and rails for any visible signs of damage, such as dents or misalignment. Use a flashlight to get a clear view of the entire length of the tracks.
2. Clear Debris
-Remove any dirt, dust, or other debris that may have accumulated on the tracks and rails. Use a soft cloth or a brush to gently wipe away the particles. Avoid using harsh chemicals or abrasive cleaners, as they can damage the metal surface.
3. Lubrication
-Apply a small amount of lubricant to the tracks and rails to reduce friction. Use a silicone-based lubricant or a garage door-specific lubricant recommended by the manufacturer. Be sure to wipe off any excess to prevent buildup.
4. Alignment
-Check the alignment of the tracks to ensure they are parallel and properly spaced. Use a level to verify if the tracks are plumb. If you notice any misalignment, loosen the mounting bolts and gently tap the tracks back into the correct position.
5. Tighten Loose Hardware
-Inspect and tighten any loose bolts, screws, or nuts that secure the tracks and rails. Loose hardware can cause misalignment and affect the smooth operation of the garage door.
Regular maintenance of the tracks and rails is essential in preventing issues with your garage door’s performance. By following these simple steps, you can ensure smooth movement and extend the lifespan of your garage door system.
FAQs
Q: Why won’t my garage door open with the remote control?
A: If your garage door fails to open using the remote control, there could be several reasons for this issue. First, ensure that the batteries in the remote control are not dead and are properly inserted. Additionally, make sure that you are within range of the garage door opener and that there are no obstructions blocking the signal. If the remote control still doesn’t work, try reprogramming it by following the manufacturer’s instructions. If all else fails, it is recommended to consult a professional garage door technician for further assistance.
Q: How can I determine if the circuit breaker is the cause of my garage door not opening?
A: If your garage door is not opening and you suspect that the circuit breaker may be the culprit, follow these steps to check its functioning. Locate the circuit breaker panel in your home and find the one labeled for the garage door opener. Check if the breaker is in the “ON” position. If it has tripped to the “OFF” position, try flipping it back to “ON” and attempt opening the garage door again. If the breaker continues to trip or if the garage door still doesn’t open, it is advisable to contact a licensed electrician to inspect the electrical system and resolve any issues.
Q: What should I do if my garage door opener motor is not functioning?
A: If the motor of your garage door opener is not functioning properly, there are a few troubleshooting steps you can take. First, check if the opener is receiving power by ensuring it is plugged in securely and that the circuit breaker for the opener is not tripped. Next, inspect the opener’s motor for any visible signs of damage or obstruction. If there are no apparent issues, it is recommended to consult a professional garage door technician to diagnose and repair the motor or suggest a replacement if necessary.
Q: How often do garage door springs need to be replaced?
A: The lifespan of garage door springs can vary depending on factors such as usage frequency and environmental conditions. On average, torsion springs typically last around 10,000 cycles, while extension springs may last between 5,000 and 7,000 cycles. However, it is important to note that springs can break unexpectedly, posing a safety hazard. Therefore, it is advisable to have a garage door technician inspect and maintain the springs regularly to ensure they are in optimal condition. They can provide recommendations based on the specific needs of your garage door.