

Welcome to our comprehensive guide on garage door seal replacement. If you’ve noticed drafts, water leaks, or pests entering your garage, it’s time to replace your garage door seal. The good news is that replacing a garage door seal is a simple and DIY-friendly task that can be done quickly and easily with the right tools and materials.
In this guide, we will walk you through the steps involved in replacing your garage door seal, ensuring your garage remains well-insulated and protected from the elements. Whether you’re a seasoned DIY enthusiast or a first-time homeowner, you’ll find valuable tips and instructions to help you complete this project successfully.
Key Takeaways:
- Regularly inspect and replace your garage door seal to maintain a weatherproof and efficient garage.
- Replacing a garage door seal is a simple and DIY-friendly task.
- Gather the necessary tools and materials before starting the replacement process.
- Follow our step-by-step guide to replace your garage door seal correctly.
- Enjoy the benefits of a well-sealed garage, including improved energy efficiency and protection against pests and weather elements.
Understanding the Importance of Garage Door Seals
Garage door seals play a vital role in ensuring the weatherproofing and efficiency of your garage. As the first line of defense against the elements, these seals help keep rain, wind, and dust from entering your garage space. Regularly inspecting and replacing your garage door weatherstripping is essential to maintain a secure and well-insulated environment.
One of the key benefits of a properly installed and maintained garage door seal is energy efficiency. By preventing drafts and air leaks, the seal helps retain the desired temperature inside your garage, reducing the strain on your HVAC system and ultimately saving on energy costs.
Another crucial aspect of garage door weatherstripping is its contribution to protecting your belongings against moisture and dust. A robust and intact seal prevents water from seeping in during rain or snowstorms, keeping your garage and its contents dry and safe. Additionally, by blocking dust and debris, the seal helps maintain a clean and tidy environment.
“A properly installed and well-maintained garage door seal provides peace of mind, knowing that your garage is protected against the elements and your belongings are safe from potential damage.”
It’s important to be aware of signs of wear and tear on your garage door seal. Over time, exposure to extreme weather conditions and regular use can cause the seal to deteriorate. Look out for cracks, gaps, or deformities in the rubber or vinyl material. If you notice any of these signs, it’s time to consider replacement to ensure optimal performance.
Replacing your garage door weather seal is a straightforward task that can be done by homeowners with basic DIY skills. By following the right techniques and using the appropriate tools, you can easily install a new seal and restore the functionality of your garage door.
Tools and Materials Needed for Garage Door Seal Replacement
When it comes to replacing your garage door seal, having the right tools and materials is crucial for achieving a professional finish. Here is a comprehensive list of what you’ll need:
Tools:
- Measuring tape
- Utility knife
- Flathead screwdriver
- Pry bar or pliers
- Caulking gun
- Drill
- Adjustable wrench
Materials:
- Garage door seal (make sure to choose the one that matches your specific door type and size)
- Weatherproof sealant
- Screws
Ensure that you have all the necessary tools and materials ready before you start the replacement process. This will help you work efficiently and minimize any potential issues that may arise.
Remember, using the appropriate tools and materials is the best way to replace your garage door seal effectively. Don’t compromise on quality, as it will ensure a lasting and reliable result.
| Tool | Description |
|---|---|
| Measuring tape | To accurately measure the dimensions of your garage door. |
| Utility knife | To cut the old seal and remove it from the door. |
| Flathead screwdriver | To pry off any existing seal or trim. |
| Pry bar or pliers | To assist in removing any stubborn seal remnants. |
| Caulking gun | To apply weatherproof sealant as needed. |
| Drill | To secure the new seal in place with screws. |
| Adjustable wrench | To tighten or loosen nuts and bolts as necessary. |
By arming yourself with the right tools and materials, you can confidently tackle the task of replacing your garage door seal and ensure a tight, weatherproof seal that will protect your garage and its contents.
Step-by-Step Guide to Replace Garage Door Seal
Replacing your garage door seal is a simple and cost-effective way to maintain a weatherproof and efficient garage. With just a few basic tools and some guidance, you can easily complete this DIY project yourself. Follow this step-by-step guide to ensure a successful garage door seal replacement.
- Preparation: Begin by gathering all the necessary tools and materials. You’ll need a utility knife, pliers, a screwdriver, a rubber mallet, a measuring tape, and a new garage door seal. Ensure that you have the correct size and type of seal for your specific garage door.
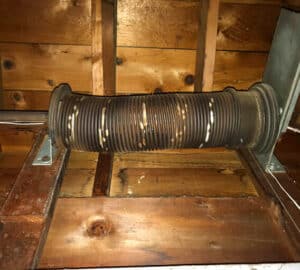
- Remove the Old Seal: Start by lifting your garage door a few feet off the ground. This will relieve any tension on the bottom seal. Next, use the utility knife to carefully cut through the old seal, starting at one end and working your way to the other. Once the seal is cut, you can pull it off with the help of pliers.
- Clean the Area: After removing the old seal, take a moment to clean the bottom of your garage door. Remove any debris or adhesive residue using a damp cloth. Ensure that the surface is dry and free from any obstacles before proceeding.
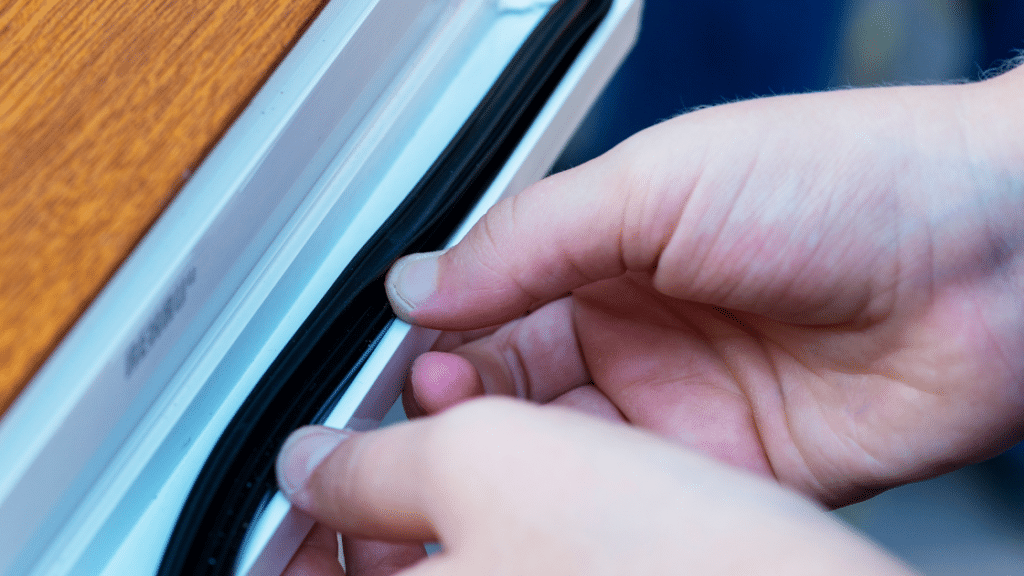
- Measure and Cut the New Seal: Unroll the new garage door seal and place it along the bottom of the door. Use the measuring tape to determine the correct length, allowing a slight overlap on both ends. Once measured, use the utility knife to cut the seal to the desired length.
- Install the New Seal: Starting from one end, insert the new seal into the track at the bottom of your garage door. Gently tap it into place using a rubber mallet. Continue to press the seal firmly into the track until you reach the other end. Ensure that the seal is securely in place and evenly aligned along the bottom of the door.
- Test the Door: Close the garage door and observe the new seal in action. Check for any gaps or misalignments. If necessary, make any adjustments by gently pulling or pushing the seal to achieve a proper fit. Open and close the door a few times to ensure smooth operation.
By following these straightforward steps, you can easily replace your garage door seal and enjoy the benefits of a well-sealed garage. Remember to regularly inspect and maintain your seal to prolong its lifespan and ensure optimal performance.
Conclusion
Replacing your garage door seal is a simple yet essential task that can have a significant impact on the weatherproofing and efficiency of your garage. By regularly inspecting and replacing the seal, you can keep out elements like rain, wind, and dust, creating a comfortable and protected space for your vehicles and stored items.
We’ve covered the key steps involved in replacing a garage door seal, from identifying signs of wear and tear to selecting the right seal and using the appropriate tools. With our step-by-step guide, you can confidently tackle this DIY project and achieve a professional result.
Now that you have all the knowledge and tools at your disposal, it’s time to put them into practice. Take action today and enjoy the benefits of a well-sealed garage. By maintaining your garage door seal, you can ensure a durable and efficient seal that will protect your garage from the elements for years to come.
FAQ
How often should I replace my garage door seal?
It is recommended to inspect your garage door seal annually and replace it every 2-3 years or as needed. Signs that it may be time for a replacement include visible signs of wear and tear, cracks, or gaps in the seal.
What are the benefits of replacing my garage door seal?
Replacing your garage door seal helps to maintain a weatherproof and energy-efficient garage. It keeps out elements like rain, wind, and dust, preventing them from entering your garage and potentially damaging your belongings. It also helps to improve insulation and reduce energy costs.
Can I replace the garage door seal myself?
Yes! Replacing a garage door seal is a relatively simple DIY project. With the right tools and materials, homeowners can easily replace the seal and enjoy the benefits of a well-sealed garage.
What tools and materials do I need for garage door seal replacement?
To replace your garage door seal, you will need a utility knife, pliers, a pry bar, a hammer, a nail gun or adhesive, a measuring tape, and a new garage door seal. Make sure to choose a seal that is appropriate for your door type and climate.
What is the best way to replace a garage door seal?
The best way to replace a garage door seal is to follow a step-by-step process. Start by removing the old seal using the appropriate tools. Clean the area thoroughly and measure the length of the door to ensure you purchase the correct size seal. Install the new seal by attaching it securely along the bottom of the garage door. Make sure it is aligned correctly and provides a tight seal. Test the door to ensure it opens and closes smoothly.