
As you pull into your driveway and press the remote control, expecting the familiar sound of your garage door obediently rolling up, nothing happens. That sinking feeling sets in as you realize it might be time to replace the battery in your LiftMaster garage door opener. While it might seem like a daunting task at first glance, with the right tools and a bit of guidance, you’ll have it functioning smoothly in no time. Trust me, you don’t need to be a garage door repair expert to get it done—and the peace of mind that comes with a fully operational garage entrance is absolutely worth it. Keep reading for a straightforward guide that demystifies the process and gets you back to effortless garage access.
Key Takeaways
- A Dimming or Unlit Power Indicator on a LiftMaster Garage Door Opener Signals the Need for a Battery Replacement
- Safety Precautions, Including Unplugging the Unit and Using Correct Tools, Are Vital When Changing the Garage Door Opener’s Battery
- The Correct Battery Type and Proper Installation Are Crucial for the Optimal Functioning of the LiftMaster Garage Door Opener
- Regular Maintenance and Energy-Saving Settings Help Prolong the Battery Life of Your Garage Door Opener
- Proper Disposal of the Old Battery Through Recycling Is Important for Environmental Sustainability
Identifying When Your LiftMaster Battery Needs Replacement
Stepping into your garage and noticing your garage door refuses to budge can be quite the headache.
It’s essential to recognize the signs that indicate your LiftMaster garage door opener might require a fresh battery.
With a bit of attention, you can interpret warning signals and alerts that are not mere quirks, but calls for maintenance.
Grasping the concept of your battery’s typical lifespan helps preempt untimely disruptions.
Should your diligent glances catch a dimming or absent power indicator, that’s your cue – the unit is signaling its need for a new power source.
Tending to these concerns swiftly can spare you from unexpected garage door repair needs and ensure continued, effortless access to your garage space.
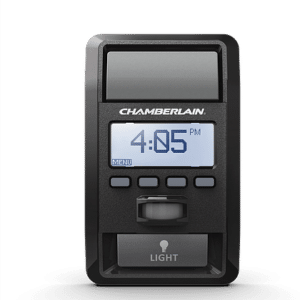
Look for Warning Signs and Alerts
When your garage door stops responding to the keypad, consider it a direct appeal for a battery checkup. Consistent sluggish movements or partial openings when you press the remote control are not quirks; they are distress signals coming from an ailing battery.
Be alert to an unlit power indicator or a beeping sound emanating from the opener – these are indicators that the battery strength is waning. A quick response to these signs can prevent you being locked out of your garage due to a dead battery.
- Garage door responds sluggishly or partially to keypad or remote control commands.
- The power indicator light on the garage door opener is off or flickering.
- Intermittent beeping sounds from the LiftMaster garage door opener unit.
Understanding the Battery Lifespan
Knowledge of your LiftMaster garage door opener’s battery lifespan is akin to understanding the rhythm of your home’s everyday flow. The typical battery offers steadfast service for about 1 to 2 years before showing signs of fatigue: it depends on usage and other environmental factors. Regular checks are a proactive measure to stay ahead of potential inconveniences.
| Function | Sign | Corrective Action |
|---|---|---|
| Keypad/Remote Control Response | Sluggish or Partial | Check/Replace Battery |
| Power Indicator Light | Off or Flickering | Check/Replace Battery |
| Opener Beeping Sound | Intermittent | Check/Replace Battery |
Your LiftMaster garage door opener is engineered with a built-in alert system, designed to buzz when the battery hits the critical low threshold. This humble beeping is more than noise; it’s an audible clue to encourage prompt battery servicing. Acknowledge these signals with an immediate check, and in turn, maintain uninterrupted access and functionality of your garage door.
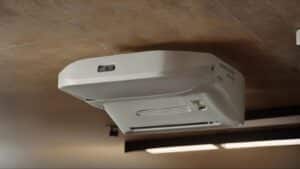
Check the Unit’s Power Indicator
Begin with a hands-on examination of your LiftMaster garage door opener by locating the power indicator. This small, yet significant light serves as a visual gauge of your unit’s battery condition: When lit, it signals a healthy charge, but if it’s dim or absent, that’s a clear flag warranting your attention to replace the battery.
Undertaking the simple step of checking this indicator regularly can stave off unexpected malfunctions with your garage door. Consider it a straightforward preventive measure, much like skimming through the terms of service of a newly installed app to avoid unintended hiccups: A glance, a quick assessment, and you’re on track to safeguard the seamless operation of your garage entryway.
| Battery Indicator Status | Implication | Recommended Action |
|---|---|---|
| Power Indicator Lit | Battery in good condition | Continue regular checks |
| Power Indicator Dim or Off | Potential battery depletion | Prepare for battery replacement |
Tools and Supplies Required for Battery Replacement
Embarking on the task of replacing the battery in your LiftMaster garage door opener calls for a set of specific tools and supplies.
Before you begin, assemble the essential items to ensure a smooth and efficient process.
You’ll need a reliable screwdriver to access the battery compartment, and identifying the correct battery model is paramount to restore your opener’s function.
Safety should never be an afterthought; equip yourself with the appropriate safety gear to shield against any unforeseen electrical hazards.
This preparation sets the stage for a successful battery exchange, keeping your garage door services running without a hitch.
List of Necessary Tools
Gather your tools with care; a steadfast screwdriver is indispensable for prying open the battery compartment on your LiftMaster garage door opener. Ensure the screwdriver fits securely to avoid stripping the screws, as a snug fit is key to a smooth battery replacement process.
Ahead of the operation, confirm that you have the correct replacement battery on hand — one compatible with your specific LiftMaster model. This detail is crucial, preferring precision over presumed fits, to guarantee a reliable backup for your garage door’s power needs.
Selecting the Correct Battery Model
Embarking on a battery replacement journey means first securing the exact battery type that your LiftMaster garage door opener dictates. This specificity is not to be overlooked, as the correct battery model ensures that your garage door operates seamlessly, and it helps maintain the integrity of the opener’s design. It’s similar to how one would carefully select the right part for a crucial home repair—it’s about the perfect fit and performance.
To determine the right battery for your unit, refer to the user manual or reach out to garage door services within your zip code for guidance. These resources are valuable in providing precise information, much like consulting a privacy policy before submitting personal details online; it’s about ensuring the match is both appropriate and secure for continued operation of your garage door.
Safety Equipment for the Replacement Process
Before you proceed with the battery replacement for your LiftMaster garage door opener, prioritize personal safety by donning appropriate gear. Slip on a pair of insulated gloves to guard against any potential electric shock, and consider safety glasses to shield your eyes from any unexpected debris.
Ensuring a safe environment is as crucial as the completion of the task itself: Unplug the garage door opener from the power source before beginning. This precaution eliminates the risk of electrical injury, setting a secure stage for the battery changing process.
- Wear insulated gloves to protect from electric shock.
- Use safety glasses to defend against flying debris.
- Disconnect the garage door opener from its power source to thwart electrical hazards.
Step-by-Step Guide to Changing the Battery
Embarking on the replacement process of your LiftMaster garage door opener’s battery is straightforward with a clear, structured approach.
Begin by ensuring the unit is disconnected from the power supply; this move is about safety first.
With your screwdriver, you’ll navigate the opener’s compartment, tactfully removing the old battery.
Subsequent to this, precise placement of the new battery is critical, taking care to match each wire with its corresponding terminal.
Reconstituting the compartment’s integrity, tighten each screw to secure the setup.
Lastly, re-establishing the power supply marks the return to functionality.
Let’s guide you through each stage to restore your garage door’s operational prowess.
Turn Off the Power Supply
Initiating the battery replacement venture for your LiftMaster garage door opener begins with a critical safety maneuver: disconnecting the power. Locate your garage unit’s power cord and unplug it from the electrical outlet; this action terminates the current and precludes the possibility of an electrical mishap during the procedure.
Once the power supply is severed, a calm assurance sets in, knowing the route to changing the battery is now secure. With the power successfully off, the risk of accidental electrical shocks is effectively neutralized, allowing you to proceed with confidence.
- Identify and unplug the power cord of the garage door opener to cut off the power supply.
- Verify the unit is completely powered down before proceeding to the next step.
Open the Battery Compartment
Proceed to the garage door opener and locate the battery compartment. Your vigilance in identifying the access panel is the first step to revealing the spent battery: often, it’s concealed by a cover that pivots out or snaps open, a subtle portal to the vitality of your garage door opener’s performance.
- Find the battery compartment, which is usually marked or indicated on the unit.
- Use your screwdriver to carefully remove or unfasten the compartment cover.
Insert the tip of your screwdriver into the seam or slot provided to pry the compartment open gently, exercising the finesse of a safe-cracker to avoid damage to the clips or the housing. With the cover pulled back or removed, the old battery will be in full view, ready for extraction and subsequent replacement.
Remove the Old Battery
With the compartment cover safely aside, it’s time to address the old battery inside your LiftMaster garage door opener. Gently disconnect the wires attached to its terminals, taking care not to pull too forcefully to prevent any damage – treat these connections with the same care you would with the delicate back of a remote control.
Once the wires are free, remove the depleted battery. Note its orientation before lifting it out to ensure the smooth installation of the new one; it’s about precision, not just a mere swap. Place the old battery aside, ensuring it’s in a spot where it won’t roll away or cause any obstruction in your workspace.
Install the New Battery Correctly
With the old battery now out of the game, it’s your moment to shine and insert the new power source into the nerve center of your garage door opener. Orient the new battery exactly as the old one was nestled in the compartment, ensuring the positive and negative terminals align correctly with the corresponding wires.
Connect each wire with care, affixing them firmly to the battery’s terminals. A secure connection is akin to clicking a seatbelt; you’ll hear or feel a slight snap or snugness that whispers ‘safety first’ for your LiftMaster garage door opener to function at its peak once again.
Close the Battery Compartment
Realigning the battery compartment’s cover, ease it back into position on your LiftMaster garage door opener. It’s akin to closing the final chapter of a well-organized notebook: a satisfying click or gentle snap indicates the cover is secure, encapsulating the new battery within.
Attaching each screw, rotate your screwdriver with deliberate precision, drawing the cover tight against the housing. This decisive action prevents any rattling or loosening that could interfere with the optimal operation of your garage door opener:
| Step | Action | Result |
|---|---|---|
| Align Cover | Place cover back onto the compartment | Cover clicks or snaps indicating a secure fit |
| Secure Screws | Tighten screws with screwdriver | Ensures cover remains firmly in place |
Turn on the Power Supply
With the confidence of successfully securing the new battery, you now face the final hurdle: restoring the heartbeat of your LiftMaster garage door opener. Plug the unit’s power cord back into the electrical outlet, a simple yet pivotal action that revives your garage door’s capabilities.
| Final Step | Action | Expected Outcome |
|---|---|---|
| Reconnect Power | Insert the power cord into the outlet | Opener reactivates with fresh battery power |
Upon re-engagement of power, observe carefully for the comforting glow of the indicator light: this beacon of assurance signifies the successful acceptance of the new battery charge. A pressing of the keypad or remote control button now sets into motion the familiar, seamless operation of your garage door, signaling the end of your battery changing venture.
Testing Your LiftMaster After Battery Replacement
Rejuvenating your LiftMaster garage door opener with a fresh battery ushers in a moment of truth: the essential post-replacement tests.
This vital step ensures everything is running correctly and is integral to guarantee your garage door grants you entry and exit without a hitch.
You’ll learn how to carry out a definitive function test, assess the opener’s response to both remote control and keypad commands, and navigate through any troubleshooting if the garage door behaves unexpectedly.
How to Perform a Function Test
Initiate the function test by engaging the opener using your remote control. Observe how the garage door responds; a silent, smooth operation is a positive indication that the new battery is performing its task successfully. A quick response to the remote’s command demonstrates the effectiveness of your battery replacement effort.
Proceed by testing the wall-mounted keypad outside your garage door. Enter your code and watch the door’s response; it should mirror the promptness and fluidity exhibited when using the remote control. This test establishes the overall health of your LiftMaster system, showing that the new battery has restored full functionality to the garage door mechanism.
Troubleshooting Common Issues After Replacement
After replacing the battery in your LiftMaster garage door opener, if the unit still exhibits unresponsiveness or erratic behavior, a few basic troubleshooting steps can be deployed. Confirm that the battery’s terminals are correctly connected to the respective wires: a mix-up here could cause functionality issues.
- Ensure that the battery terminals are properly connected to the corresponding wires.
- Check the battery’s orientation within the compartment to avoid reverse installation.
- Inspect the compartment cover to make certain it’s snapped shut, allowing for no loose connections.
Should the issue persist beyond these checks, resetting the system might be necessary. To reset, hold down the ‘Learn’ button on the garage opener for about six seconds until the indicator light goes out. Re-establishing this connection can often re-sync the unit to its keypad and remote control, offering a clean slate for optimal operation.
Important Tips for Extending Battery Life
Maintaining the longevity of your LiftMaster garage door opener’s battery goes beyond simple replacement; it invites a commitment to regular upkeep and savvy use of settings designed to conserve battery life.
Embrace these tips as your silent guardians against premature battery drain, ensuring that your garage remains an accessible sanctuary.
Focusing on habitual maintenance and the smart employment of energy-saving features will contribute to sustained, reliable operation, keeping your garage door’s rhythmic hum a constant in your daily routine.
Regular Maintenance Tips
Adopt a regimen of visual checks and balance for your LiftMaster garage door opener, targeting the battery’s power indicator as a routine practice. This habit, akin to checking your vehicle’s oil level, ensures early detection of battery decline, paving the way for timely replacement and uninterrupted garage door services.
Regularly dust and clean the battery compartment and its terminals to ensure an unimpeded flow of power, and to forestall build-up that could lead to corrosion. This, much like preserving the integrity of any high-use tool, is fundamental in prolonging the life of your battery and maintaining the peak performance of your garage door opener.
Optimal Settings for Battery Conservation
To extend the lifespan of your LiftMaster garage door opener’s battery, you should consider adjusting the settings to lower energy consumption when it’s not in use. Enable the power save mode, if available, which curtails the energy drain by shutting down certain features after a period of inactivity.
Another way to conserve battery life is by calibrating the opener’s force settings, ensuring it uses only the necessary amount of energy to open and close the garage door. Overworking the system with excessively high force settings can hasten battery depletion, so ensure they’re set correctly for optimal efficiency.
Recycling Your Old Garage Door Opener Battery
Replacing the battery in your LiftMaster garage door opener restores functionality, but it also raises the question of what to do with the old battery.
Proper disposal is not just a matter of decluttering your workspace; it’s a crucial step to minimize environmental impact.
As you embark on removing the spent power cell, remember that your actions can contribute to a larger effort of conservation and sustainability.
Below, you’ll learn the significance of recycling, how to safely handle old batteries, and where you can locate recycle centers in your vicinity to ensure your old battery is disposed of responsibly and effectively, in alignment with your garage door repair and maintenance tasks.
Why Recycling Is Important
Recycling your old garage door opener battery is a commitment to environmental stewardship. By choosing to recycle, you keep hazardous chemicals and metals from contaminating soil and water and aid in the conservation of natural resources by reducing the need for raw material extraction.
Imagine each disposed battery as a potential harm diverted from the ecosystem when you recycle, you’re not only tidying up your space but playing an active role in the circular economy. This ensures that components of your old battery can be transformed into new products, perpetuating a cycle that values sustainability.
How to Safely Dispose of Old Batteries
Handling an old battery with care is imperative; remember, it contains materials that can be harmful to the environment. Always wear gloves to protect your skin and ensure the battery is kept away from children and pets. Opt for a cautious approach just as you would when dealing with any other potentially hazardous household waste.
Once the battery is out, do not toss it in the trash. Local regulations often demand specific disposal methods for such items. Identify a battery recycling facility in your area that accepts garage door opener batteries. Participating in an authorized recycling program is not just safe; it’s a step towards responsible and sustainable living:
- Wear gloves and keep the battery away from vulnerable individuals or pets.
- Locate and utilize a battery recycling center or program for disposal.
Finding Local Recycling Centers
Locating a recycling center for your old LiftMaster garage door opener battery starts with a simple online search related to your zip code. Many local waste management services provide details on their websites about the recycling programs they offer, including drop-off locations for batteries and other hazardous materials.
Alternatively, home improvement stores and automotive parts retailers often have in-store recycling programs. You can visit these businesses or contact them directly to inquire if they accept garage door opener batteries for recycling, thereby ensuring your old battery aids in sustainability while you maintain the integrity of your garage space.
Conclusion
Successfully changing the battery in your LiftMaster garage door opener is an accomplishment that ensures smooth operation and reliable access to your garage. Remember, addressing battery issues promptly not only preempts unexpected disruptions but also lays the groundwork for hassle-free garage door functionality.
Your vigilance in performing regular checks and replacing batteries before they fail demonstrates a dedication to maintaining the heart of your home’s accessibility. As a responsible homeowner, you’re now familiar with the importance of this routine care, which guarantees the enduring performance of your garage door opener.
Embrace the process as a testament to your home maintenance skills and a reflection of your ability to adapt to the technical demands of modern living. With your newly installed battery, your Liftmaster garage door opener is primed to deliver the seamless service that keeps your daily routine running efficiently.
Take pride in knowing that by following these steps, you’ve upheld the operational integrity of your garage door system. Let the smooth, swift motion of your garage door serve as a silent accolade for the care and attention you’ve invested in ensuring the longevity of your LiftMaster’s lifeline.
Frequently Asked Questions
How do I know when to replace my LiftMaster battery?
When your LiftMaster garage door opener begins to operate sluggishly or the keypad fails to respond consistently, it’s a clear indication that the battery might need a replacement. Keep an eye out for the unit’s backup battery indicator on the opener, as it will often signal when the time for a change is nearing.
What tools will I need to change my LiftMaster battery?
To change your LiftMaster battery, you’ll need a screwdriver to open the compartment, and possibly a small pair of pliers if there’s a wire harness to disconnect. Make sure you have your new battery ready to go as well.
Can I perform the battery change on my LiftMaster myself?
Absolutely, changing the battery in your LiftMaster garage door opener is a doable task that you can perform with minimal tools and some guidance. It’s an easy process that will restore uninterrupted performance to your garage door system.
Why should I test the opener after replacing the battery?
Testing the opener after you replace the battery is crucial to ensure functionality, allowing you to spot any potential issues immediately. It’s a simple validation that the battery is installed correctly and that your LiftMaster garage door opener is operational.
Where can I dispose of my old LiftMaster battery?
You can dispose of your old LiftMaster battery at local recycling centers that accept batteries. Ensure to check the recycling guidelines specific to your zip code or area to do so responsibly.