If you have a LiftMaster garage door opener, programming it is a simple process that can greatly enhance the functionality and security of your garage. Whether you need to set up a new opener or reprogram an existing one, we have you covered with step-by-step instructions to ensure flawless operation.
In this guide, we will walk you through the process of programming your LiftMaster garage door opener, including the initial setup, keypad programming, troubleshooting tips, and the importance of consulting your LiftMaster garage door opener manual for further assistance. By mastering the programming aspects, you’ll be able to make the most out of your LiftMaster garage door opener’s capabilities.
Key Takeaways:
- Programming your LiftMaster garage door opener is a straightforward process that can greatly enhance functionality and security.
- Follow the provided step-by-step instructions carefully for flawless operation.
- Don’t hesitate to explore additional features such as remote programming, Wi-Fi setup, and app integration for a more personalized experience.
- Consult your LiftMaster garage door opener manual for troubleshooting tips and further assistance.
- Mastering the programming aspects will help you make the most out of your LiftMaster garage door opener.
LiftMaster Garage Door Opener Setup
Are you ready to set up your new LiftMaster garage door opener? In this section, we will guide you through the process step by step. From connecting the opener to configuring settings, these instructions will ensure that your opener is ready to use in no time. Follow the LiftMaster Garage Door Opener Setup Instructions below to get started.
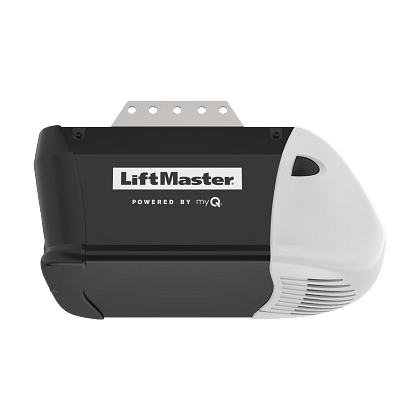
- Unpack and Inspect: Begin by unpacking your LiftMaster garage door opener and inspecting all the components. Make sure everything is included and in good condition.
- Mounting the Opener: Choose a suitable location to mount the opener on your garage ceiling. Ensure it is level and securely attach it using the provided hardware.
- Connect the Power: Locate the power source, usually an electrical outlet near the opener. Plug in the opener and ensure it receives power.
- Program the Remote Control: Follow the LiftMaster Garage Door Opener Programming Guide to program the remote control that came with your opener. This will enable you to operate the door with ease.
- Adjust the Opener Settings: Use the control panel or mobile app to adjust the settings of your LiftMaster garage door opener. Set the desired opening and closing speeds, sensitivity, and other preferences.
- Test the System: Once everything is set up, perform a test to ensure that the opener functions properly. Open and close the garage door using the remote control and check for any issues or unusual noises.
Pro Tip: It’s important to carefully follow the provided LiftMaster Garage Door Opener Setup Instructions to ensure proper installation and functionality. If you encounter any difficulties, refer to the detailed manual that came with your opener or consult LiftMaster’s customer support for assistance.
LiftMaster Garage Door Opener Setup Instructions:
- Unpack and inspect all components.
- Mount the opener securely on the garage ceiling.
- Connect the opener to a power source.
- Program the remote control.
- Adjust the opener settings.
- Test the system to ensure proper operation.
LiftMaster Keypad Programming
If you have a keypad for your LiftMaster garage door opener, programming it is a breeze. This section will walk you through the process step-by-step, ensuring that you can set a secure code and sync it with your opener for convenient access.
Step 1: Prepare Your Keypad
Before you begin programming, make sure your keypad is ready. Locate the “Learn” button on your LiftMaster garage door opener. This button is usually found near the antenna wire or on the back panel. Press and release the “Learn” button to put your opener into programming mode.
Step 2: Enter Programming Mode
Now it’s time to enter programming mode on your keypad. Press and hold the “Learn” button on the back of the keypad until the LED light starts blinking. This indicates that your keypad is ready to receive the new code.
Step 3: Set a Secure Code
Choose a secure code that you’ll easily remember but is difficult for others to guess. Use a combination of numbers that is not easily associated with personal information, such as birthdates or addresses. Enter your chosen code into the keypad, ensuring that each digit is correctly inputted.
Step 4: Sync with Your Opener
After setting your code, it’s time to sync your keypad with your LiftMaster garage door opener. Press the “Learn” button on your opener once again. You’ll notice that the LED light on the keypad blinks rapidly, indicating a successful syncing process. Test your new code by entering it on the keypad and verifying that the garage door opens and closes as expected.
That’s it! You have successfully programmed your LiftMaster keypad. Enjoy the convenience and security of easy access to your garage with a personalized code.
| Benefits of LiftMaster Keypad Programming | ||
|---|---|---|
| Convenient Access | Secure Code | Easy Syncing |
| Eliminates Need for Keys | Control Who Has Access | User-Friendly Interface |
| Increased Security | Quick and Easy Setup | Compatible with Multiple Openers |
Troubleshooting and Manuals
Sometimes, issues may arise with your LiftMaster garage door opener. Whether it’s a malfunctioning remote, a door that won’t open or close properly, or any other problem, don’t worry. In this section, we’re here to help you troubleshoot common issues and provide solutions to get your garage door opener back in optimum working condition.
Troubleshooting Tips
If you’re experiencing difficulties with your LiftMaster garage door opener, try these troubleshooting tips before calling for professional assistance:
- Check the power: Make sure the opener is plugged in and receiving power. If it’s battery-operated, replace the batteries.
- Inspect the sensors: Ensure that the safety sensors are aligned correctly and not blocked by any obstructions.
- Reset the opener: If the opener stops functioning properly, try resetting it by unplugging it for a minute, then plugging it back in.
- Test the remote: If the remote isn’t working, replace the batteries and reprogram it to the opener.
Consulting the Manuals
Your LiftMaster garage door opener comes with detailed manuals that provide comprehensive instructions for installation, programming, and troubleshooting. It’s essential to consult these manuals when you encounter any issues or have questions about your opener’s functionalities.
If you’ve misplaced your manual or need a digital copy, you can easily find and download the LiftMaster garage door opener manuals from the official LiftMaster website. The manuals contain valuable information on troubleshooting specific problems, adjusting settings, and maintaining your opener for long-lasting performance.
Remember, the manuals are designed to assist you in troubleshooting and resolving common problems on your own. However, if you’re unable to resolve the issue or feel uncomfortable doing so, it’s best to seek professional help from a certified LiftMaster technician.
| Problem | Solution |
|---|---|
| The garage door opener doesn’t respond to remote commands | Replace the remote batteries and reprogram the remote to the opener. If the problem persists, check for any interference sources and adjust the opener’s antenna. |
| The garage door doesn’t close completely or reverses immediately after closing | Inspect the safety sensors and ensure they are correctly aligned. Remove any obstructions blocking the sensor’s path. Adjust the opener’s force and travel limit settings. |
| Unusual noises or vibrations during operation | Inspect the garage door tracks for any obstructions or debris. Lubricate the moving parts of the opener, such as the chain or belt, to reduce friction and noise. |
| The opener’s lights don’t turn on | Check the lightbulbs; replace them if necessary. If the issue persists, inspect the opener’s electrical connections and replace any faulty components. |
Conclusion
Programming your LiftMaster garage door opener is a crucial step in maximizing the functionality and security of your garage. By following the provided instructions carefully, you can ensure smooth operation and convenient access to your garage.
But why stop there? LiftMaster offers additional features that can further enhance your experience. Take advantage of remote programming to control your garage door opener from anywhere, even when you’re not at home. With remote access, you can open or close your garage door with just a few taps on your smartphone.
Another valuable feature is Wi-Fi setup, which allows your LiftMaster garage door opener to connect to your home network. This enables you to monitor and control your garage door from your smartphone or tablet, providing added convenience and peace of mind.
For the utmost convenience, consider integrating your LiftMaster garage door opener with compatible apps. These apps offer a range of features, from advanced scheduling options to voice control capabilities. By exploring app integration, you can tailor your garage door opener to match your lifestyle and preferences.
FAQ
How do I program my LiftMaster garage door opener?
To program your LiftMaster garage door opener, follow these steps: 1. Locate the “Learn” button on your opener, typically located near the motor unit. 2. Press and release the “Learn” button. The “Learn” LED light should illuminate. 3. Within 30 seconds, press and hold the desired button on your remote control or keypad until the opener’s lights blink. 4. Release the button, and the opener should be programmed. Test it by pressing the programmed button to open or close the garage door.
How do I set up my LiftMaster garage door opener?
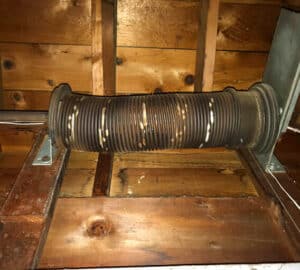
To set up your LiftMaster garage door opener, follow these instructions: 1. Attach the opener’s motor unit to the ceiling or wall near the garage door. 2. Connect the opener’s power cord to a power outlet. 3. Follow the manufacturer’s instructions to connect the opener to the garage door and torsion springs. 4. Adjust the opener’s settings, such as travel limits and force settings, as per the user manual. 5. Test the opener by opening and closing the garage door using the remote control or wall button.
How do I program the keypad for my LiftMaster garage door opener?
To program the keypad for your LiftMaster garage door opener, follow these steps: 1. Locate the “Learn” button on the opener’s motor unit. 2. Press and release the “Learn” button. The “Learn” LED light should turn on or blink. 3. Enter a four-digit PIN of your choice on the keypad and press the “Enter” or “Learn” button. 4. The opener’s lights should blink, indicating that the keypad is now programmed. Test it by entering your PIN and opening or closing the garage door.
What should I do if I encounter problems with my LiftMaster garage door opener?
If you experience issues with your LiftMaster garage door opener, try the following troubleshooting steps: 1. Check the power source to ensure the opener is receiving electricity. 2. Inspect the garage door for any obstructions or debris that may impede its movement. 3. Verify that the photo-eye sensors, located near the bottom of the garage door, are aligned and clean. 4. Replace the batteries in your remote control or keypad if they are low. 5. If problems persist, consult the user manual or contact LiftMaster customer support for further assistance.
Where can I find the manual for my LiftMaster garage door opener?
LiftMaster provides manuals for their garage door openers on their website. To find the manual for your specific model, visit the LiftMaster website and navigate to the Support or Resources section. Enter your opener’s model number to access and download the corresponding manual.


